
|
Search | FAQ | US Titles | UK Titles | Memories | VaporWare | Digest | |||||||
| GuestBook | Classified | Chat | Products | Featured | Technical | Museum | ||||||||
| Downloads | Production | Fanfares | Music | Misc | Related | Contact | ||||||||
| RCA J/K CED Player Function Motor Replacement | ||||||||||||||
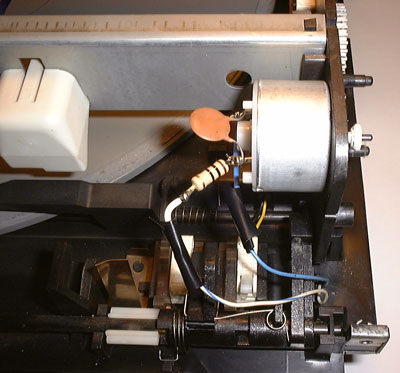
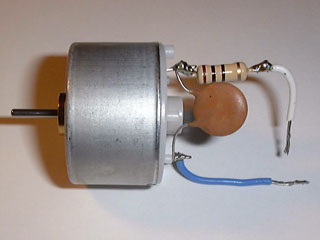 Pictured at left is a replacement for the function motor found in all RCA J/K players as well as the JC Penney 686-5705 player. This is a Mabuchi motor identical in external appearance to the long unavailable motor originally installed in the players, but with a different armature resistance. The 10 ohm resistor (four-striped object) has been added to match this unit to the original motor. Without this resistor the motor will still work, but it will load and unload the caddy much faster, which puts more stress than desirable on this size of a motor. The brown disc below the resistor is a 47,000 picofarad capacitor which was present on players when shipped from the factory but may be absent if the player has previously undergone a function motor replacement. Like the 10 ohm resistor, this capacitor is not necessary for the motor to operate, but it does smooth the transition when the function motor mechanism reverses direction, resulting in reduced stress on the motor.
These motors are new old stock (NOS), as this exact Mabuchi design has been unavailable for some time. The specs for a suitable replacement motor are a 6 to 9 volt unit 32mm in diameter with a 20mm body and two 2.6 x 0.45 mounting holes spaced 22mm apart. The motor shaft needs to be 2mm in diameter to accept the pulley from the old motor. Motors from other manufacturers should be about this size, as a smaller motor may be overstressed by the load requirements, and a larger one (in terms of body length) may demand too much current from the function motor control mechanism.
Before replacing the motor, try to make certain it is really worn out. If the motor can be heard continually spinning when the player is turned on, it's probably the drive belt that's worn out rather than the motor. If the belt is good, but the player will just barely pull a caddy inside, the motor is probably worn out. If the mechanism doesn't work period, there could be a number of reasons, but if the motor gets warm after the player has been left on a few minutes, it is probably internally "seized up" and will have to be replaced. The instructions below tell how to test the old motor after removal with an external power source, but it should not be tested this way while still connected to the player, as damage to the motor drive circuitry could result.
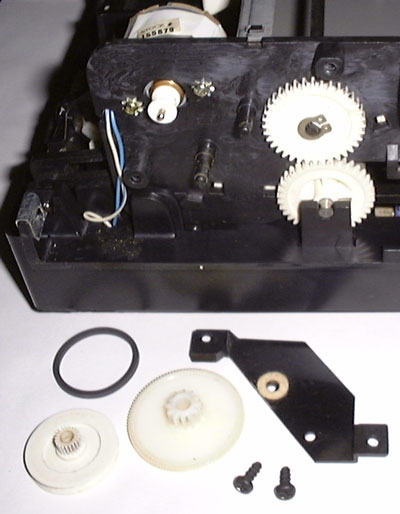 (1) Remove the player cover and disassemble the function motor gear train at the left rear of the player (when you're facing the front of the player). The removed gear train pieces can be seen at the bottom of the picture. For detailed instructions on performing this step, see the RCA J/K Player Function Motor Drive Belt Replacement page.
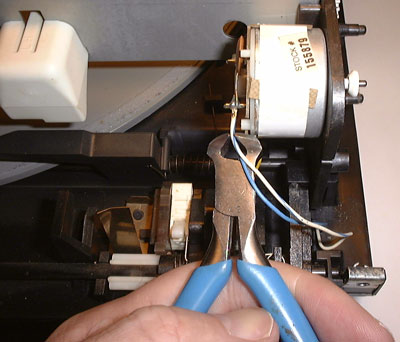 (2) Cut the two wire leads going to the old function motor very close to where they are attached to the motor.
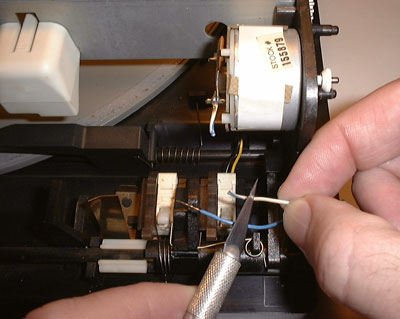 (3) Strip about a quarter inch of insulation off the end of each of the wire leads that go into the player. This can easily be accomplished with a wire stripper, but if you don't have this tool, a razor blade can be used to carefully score a groove around the circumference of the insulation. By grasping this groove between your thumbnail and index finger, the insulation can be pulled off.
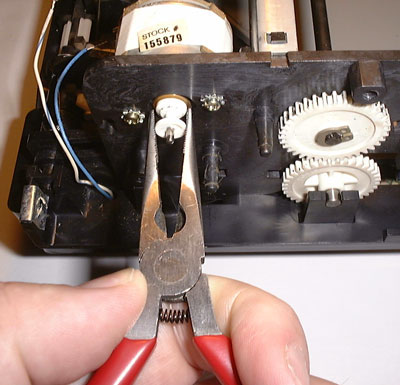 (4) Grasp the motor pulley with a pliers and pull it straight off the motor shaft. Remove the two small Phillips screws to either side of the motor shaft, and the old motor will be free. The pulley and screws need to be retained for installation of the new motor.
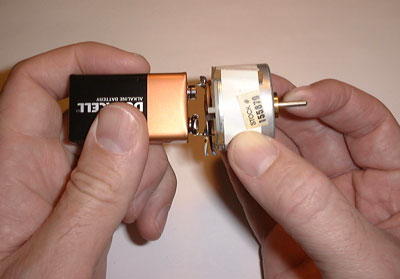 (5) To confirm it is defective, the old motor can be tested with a regular 9 Volt battery by holding the battery contacts against the motor contacts and pressing a finger against the motor shaft. With a good motor, it should be very difficult to stop the shaft from spinning by this finger pressure applied to the shaft. Reverse the battery to confirm the motor will spin in the opposite direction. If the motor passes this test, the problem with the player is elsewhere, possibly in the function motor drive circuitry, although at this point the player should still be tested with the new motor.
CAUTION: Avoid using the battery test on a motor whose leads have not been cut (Step 2 above), as applying external electric current to the player might damage the function motor control circuitry.
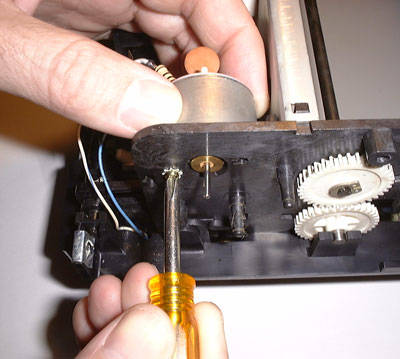 (6) Install the new motor (with the red mark on the motor oriented at the top) by securing the two Phillips screws through their mounting holes. After the screws are tightened, press the pulley from the old motor onto the drive shaft of the new motor.
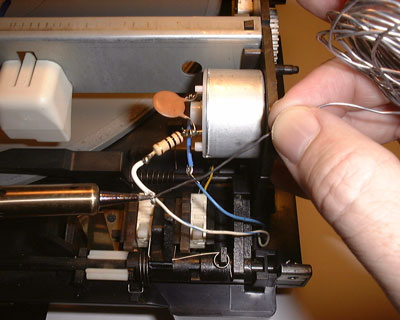 (7) Secure the motor drive leads (cut in Step 2) to the short leads provided on the new motor. The blue lead on the motor goes to the blue lead in the player, and the white lead on the motor goes to the predominantly white lead in the player. After wrapping the exposed leads tightly together, the connections should be soldered as shown here. If you lack a soldering iron, it isn't absolutely necessary to solder the joints as long as a secure mechanical connection has been made.
 (8) Wrap the two connections tightly and separately with approved electrical tape. A short length of electrical tape is taped inside the envelope I mail the motor in for this purpose. Reassemble the function motor gear train following the procedure on the Function Motor Drive Belt Replacement page. Test the player's operation prior to placing the cover back on.